
By: Sarah K. and Maggie E.
Don’t have any jewelry to wear? Why not make some? Friendship bracelets are easy to make and there are different kinds.
Supplies:
String – any colors you want
Scissors
Tape (optional)
Knotted Bracelet:
- Gather 3 pieces of string in any colors you want. Cut each string about 15 inches long.
- Tie all the strings together in knot at the top.
- Secure the string with tape to something stable like a desk or table.
- Spread out the three pieces of string
- Tie a knot with the 1st and 2nd string. After you have tied the knot swap their places.
- Tie a knot with the 2nd and 3rd string. Then swap their places.
- Keep repeating steps 5 and 6 until your bracelet has reached the desired length.
- Remove the bracelet from the tape (or anything you used to secure it)
- Tie the two ends of the bracelets together and cut any excess string.

Enjoy!
Chevron Bracelet:
- Cut 4 bands of string in whatever colors you would like.
- Cut each string to be about 60 inches (5 feet) long.
- Fold your strings in half so all the ends meet on one side.
- Make a knot on the other end where there is a loop.
- Secure the knot to a something stable such as a desk or table.
- You should have eight strings now.
- Split the strings in half so there is one of each color on each side.
- Spread the strings out on each side to where the same color would be on the other side (for example if I was using Pink, Purple, Green, and Blue string I would line up the pink strings, the purple strings, the green strings, and the blue strings.)
- Now you are going to start tying the knots.
- Start on the left four strings, on this side you will do forward knots.
- Take the top string and the one below it. Take the first string and make a four over the second string, then pull it through. Repeat that again to finish the forward knot. Then switch the places of the strings.
- Do the same thing in step 11 but with the new 2nd sting and the 3rd string. Then switch their places.
- Repeat step 11 again but with the new 3rd string and the 4th string.
- Now, move to the right side with the other four strings.
- Spread the strings out on the right side in the same order as you started on the left side (Do not Put the strings in the same order as the left side is as its finished, put it in the same order of the strings on the left before you started tying the knots on the left.)
- Now you are going to mirror the steps you did on the other side except you will use a backward knot which is almost the same thing, the four you make is just backwards.
- Now you are going the make a backwards knot with the top string and the 2nd string then switch the places of the strings.
- Then tie the exact same knot with the new 2nd string and the 3rd string then switch their places.
- Then tie the same knot with the new 3rd string and the 4th string then switch their places.
- Now you should have two of the same colors in the middle, then tie the two strings of the same color with a forward knot. Only tie those two strings together!
- Next, go back to the right side.
- Repeat steps 8-21 until your bracelet has reached your desired length.
- Remove the bracelet from where it has been secured.
- Finally, tie the two ends of the bracelet together.
- Enjoy!
Single Stripe Bracelet:

This is probably the simplest bracelet. Depending on how many strings you use, it also tends to be the fastest to make.
Here’s how to make one.
Take at least two strings and cut them each to roughly your arm span. Just know that there will always one less knot than strings and how many strings you use adds to the amount of colors and the width of the bracelets. It will also add to how long it takes to make.
I find that lining this up like this helps me get them all the same length and keep them in the order I want when I tie them in a knot.

Next, tie all the strings together, like this.


When you’re done cutting the excess string, it should look like this.

To make it adjustable, we’re going to braid it. Separate the strings into three groups and braid them together until they’re about this long.

Then tie a knot to keep the braid.

Now we can start making the bracelet.
A brief explanation is to tie a bunch of little knots, but I’m not just going to throw you string and tell you to make a bracelet.
First, take the string you want to make your first row with. Then take the string you want to make the second row out of and make a four over it with the first string. Like this.

Take the end of the four and take it under the second string and through the four. It will look like this afterwards.

Then pull both strings. The lower string needs to have a certain amount of tension and the upper string (the first one) needs to be pulled up to make a knot.
Be sure to make two knots on each string, one knot over the other.
When you’ve finished both, it will look like this.

Continue tying the knots, one pair on each string, until you get to the end.
A little bit of information, your first row on almost every bracelet will look weird, it’s just a given.
To start the next row, take the far left string and tie the knots in the same method I showed you before, working to the right.
Your second row, the strings will stay in the order you put them in, mostly. Every row after the first should, unless there’s something I haven’t learned yet about these things.
Just continue along, keep doing your rows. It’s going to take a while, maybe get yourself a snack or some water.
After you’ve been working on it for a little while, it should look like this.

It’s tedious isn’t it? But it will pay off with a cool bracelet, right?
After this point, it’s really kind of boring, mostly just takes patience.
But after a couple hours of sitting and tying tiny knots over and over again, it will start getting really long.
If you so desire, you could turn it into a bookmark. If you are going to, skip to finishing, but if you are going to make it a bracelet, depending on how big your (or the person you’re making the bracelet for) wrist is, you have a while to go.
To make it feel a little less annoyingly long, I would suggest listening to music. And if you’re looking for something fun, race the ridiculously short songs. What will end first, your row or the song?
When you get it long enough, tie another knot on the end, like the two on the top of the bracelet, to keep the little tiny knots from untying themselves.

Once you’ve done that, braid until it’s roughly the same length as your first braid.

After that, tie another knot and cut the excess string. Now you have a bracelet!

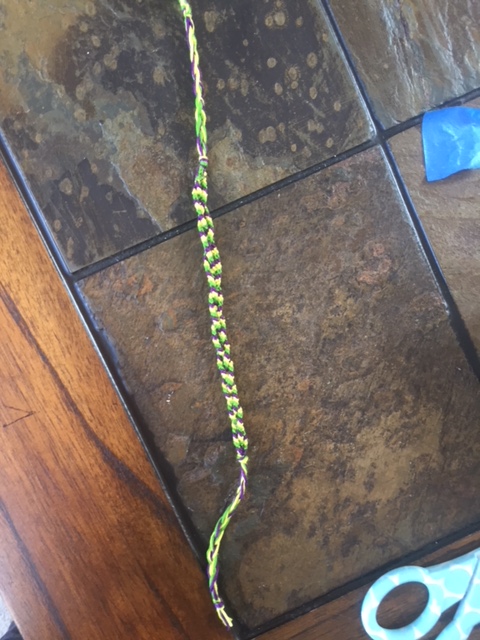
Braided DNA-like Bracelet:

If you get bored of making single stripe bracelets and chevron bracelets, maybe try this one.
The short explanation is cut three sets of colors, tie a knot, braid them, tie a second knot, make three separate bracelets attached to one braid, then braid those bracelets into one bracelet, then tie another knot to keep then in a braid, then braid the remaining strings, then tie a final knot, and cut the excess string. Complicated and time consuming, but it’ll look cool.
Now I will go in depth on how.
Cut at least 6 strings, of varying colors or the same ones, your choice, to about your arm span.
Now tie a knot in the top of all the strings.
And your final product (after you cut any extra strings) should look like this.
I just have to warn you that this bracelet is going to have a lot of knots.
Now braid the strings until the braid is about this long.
Then tie another knot at the bottom of the braid.
Now separate the strings into three groups. Tie knots on the top of each one to keep them separate from each other.
Like these.

Then as you do when you’re making a bracelet. If you don’t know how, here’s how.
Take the string you want the first row to be of and make a four over the string you want the row after it to be of.
Like this.
Then take the end of the first string and take it under the second and through the loop where both of the cross. It should make this string like this.
Now pull both strings, the second string, towards you, the first, away. You have your first knot. You’re gonna have to do this twice per string, so repeat this.
Now move to the next string, make the four, pull the string through, pull it up, and do it again.
Do that for each string in that row.
Now move to the next set of strings. Do not attach these to your previous set.
Once you finish that, move to the next set. I find it easier to do a row on one set, then work to the farthest right set, but you might not.
After you have been working on this for a little bit, it should look a little like this.

From now on, it’s a game of patience. Making this bracelet takes time, so don’t feel bad if you have to take a break for a little while.
I’ve found it feels a little less painfully slow if you listen to music. I occasionally race songs to see if I can finish a row before it ends, that’s fun.
A small piece of advice, make this bracelet a little longer than you normally would, since we’re going to braid it, it’ll lose a bit of length.
Once it reaches the length you want it, separate the three mini-bracelets and braid them together. I would measure it again to see if it’s still a good length.

If it is, tie a knot on the bottom of the bracelet to keep it braided.
Then braid the string below the knot until it’s about the same length as the top braid.

Once it is, tie another knot and cut the extra strings.
Now you have a really cool bracelet!
No comments:
Post a Comment